Homemade Cherry Jam Recipe
Jun 09, 2025

This post may contain affiliate links. Please read our disclosure policy.
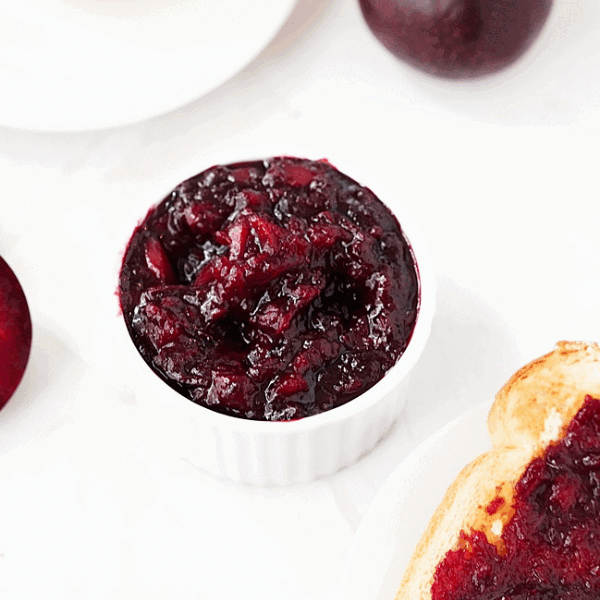
Imagine spreading vibrant, sweet, and tangy cherry jam, bursting with fresh fruit flavor, onto your morning toast. There’s nothing quite like homemade cherry jam, and the good news is, it’s incredibly simple to make!

This easy cherry jam recipe uses just three basic ingredients to create a delicious spread that captures the essence of summer in every jar. Skip the store-bought versions and dive into the satisfying world of fruit preserving with this simple, step-by-step guide.
Related: How to Freeze Cherries
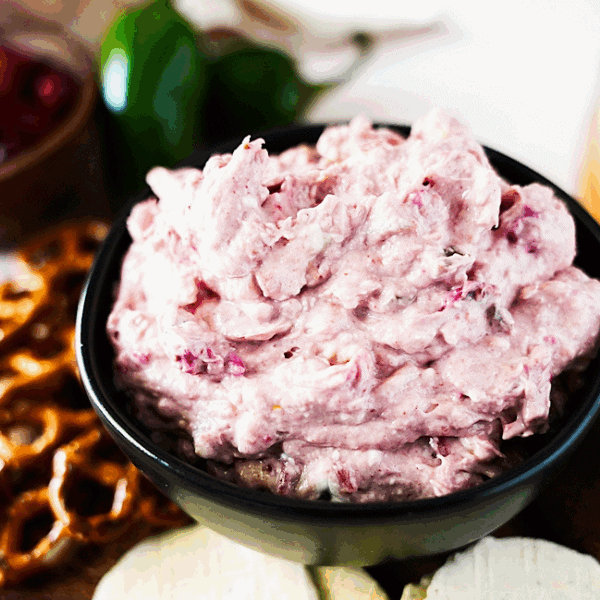
We enjoy making homemade jam recipes! It’s a great way to use up a lot of fresh fruit and, in our opinion, so much better than store-bought. Check out our Homemade Blackberry Jam, Jalapeno Blueberry Jam and Strawberry Rhubarb Jam recipes. Also, be sure to check out our Cherry Glazed Salmon recipe that utilizes this homemade cherry jam recipe.

Why You’ll Love This Homemade Cherry Jam:
- Pure Cherry Flavor: Made with fresh cherries, the taste is far superior to many commercial jams.
- Simple Ingredients: You only need cherries, sugar, and lemon juice – that’s it!
- No Pectin Needed: The natural pectin in the cherries (and a boost from the lemon juice) does all the work.
- Versatile: Perfect for toast, pancakes, yogurt, desserts, or even savory dishes.
- Great for Gifting: Homemade jam makes a thoughtful and delicious present.

Tips for Homemade Jam Success:
- Cherry Varieties: Any sweet or tart cherry variety will work! Tart cherries will yield a more intensely tangy jam, while sweet cherries will create a milder, sweeter spread. A mix of both is also excellent.
- Pitting Cherries: A cherry pitter is a fantastic tool for this, but if you don’t have one, you can use a sturdy straw, a chopstick, or even the back of a pastry tip to push the pit out.
- Sterilizing Jars: For short-term storage in the fridge, simply washing jars and lids thoroughly with hot soapy water and rinsing well is often sufficient. If you plan for longer pantry storage, research proper canning and sterilization methods.
- Don’t Rush the Boil: The rolling boil is crucial for activating the pectin and evaporating excess water, which helps the jam set properly.
- Adjust Sweetness (Optional): Once the jam is cooked, you can taste it (carefully, it’s hot!) and if you prefer it sweeter, stir in a tiny bit more sugar. However, be cautious not to add too much, as it can affect the set.

Frequently Asked Questions
What is the difference between cherry preserves and cherry jam?
While “jam” and “preserves” are often used interchangeably, especially in casual conversation, there’s a technical difference, primarily in the consistency and the form of the fruit used:
- Jam: Jam is typically made from crushed or mashed fruit. It has a relatively smooth, consistent texture, though it may contain small pieces of fruit. The fruit is broken down during the cooking process.
- Preserves: Preserves contain whole fruit or large pieces of fruit suspended in a syrupy gel. The goal is to keep the fruit pieces largely intact, giving preserves a chunkier, more textural feel than jam.
Do I need to use pectin to make jam?
Not always! Many fruits, like apples, citrus, and some berries (especially unripe ones), contain enough natural pectin to set jam on their own, especially when combined with lemon juice. Other fruits, like strawberries or cherries, benefit from added pectin if you want a very firm set, but many recipes (like the one we just discussed) can achieve a beautiful set without it, resulting in a slightly softer consistency.
How do I know when my jam is set/done? (The “Setting Point”)
This is the most common question! There are a few reliable tests:
- Cold Plate Test: Place a few small plates in the freezer before you start cooking. When you think the jam is ready, spoon a small amount onto a chilled plate. Let it sit for 30-60 seconds, then push it gently with your finger. If it wrinkles and stays in place, it’s set. If it runs, cook for a few more minutes and retest.
- Temperature Test: A candy thermometer is very accurate. Most jams reach their setting point between 218°F and 222°F (103°C and 105°C) at sea level. This temperature increases slightly at higher altitudes.
- Sheet Test: Dip a cold spoon into the jam, lift it, and hold it horizontally. If the jam forms a “sheet” or a thick drip that falls off the side of the spoon, it’s ready.
Why is my jam too runny/too stiff?
- Too Runny: This usually means it hasn’t cooked long enough to reach the setting point. Return it to the heat and continue simmering, retesting frequently with the cold plate or temperature test. Insufficient pectin (natural or added) or too much liquid can also be factors.
- Too Stiff: This often happens if it’s cooked too long, or too much pectin was used. If it’s very stiff, you might be able to gently reheat it with a little water or fruit juice to loosen it, but it’s hard to fully reverse.
Do I need to sterilize my jars?
- For Refrigerator/Short-Term Storage (up to a few weeks): Simply washing jars and lids thoroughly with hot, soapy water and rinsing well is usually sufficient. Allow them to air dry or dry in a low oven.
- For Shelf-Stable/Long-Term Storage (canning): Yes, proper sterilization is crucial to prevent spoilage. This involves heating jars in boiling water, an oven, or a dishwasher’s sanitizing cycle. Lids typically need to be simmered in hot water. Always follow tested canning guidelines from reputable sources (like the National Center for Home Food Preservation) if you plan to store jam at room temperature.
Can I use different types of sugar?
Granulated white sugar is standard for jam making as it helps with the set and preserves the fruit color and flavor. While you can experiment with less refined sugars like brown sugar or raw sugar, they can change the flavor profile and sometimes affect the set or clarity of the jam. Artificial sweeteners are generally not recommended for jam as they don’t provide the necessary bulk or preservation qualities.
How long does homemade jam last?
- In the Refrigerator: Properly made and stored jam will last for several weeks to 1-2 months.
- Shelf-Stable (Canned): If properly processed using a water bath canner, jam can last for at least 1 year in a cool, dark place. Once opened, it should be refrigerated.
Can I use frozen fruit for jam?
Yes! Frozen fruit works beautifully for jam. There’s no need to thaw it completely; you can often add it directly to the pot. It might release more liquid initially, so the cooking time could be slightly longer to reach the setting point.
Why did my jam get moldy/spoil?
Mold or spoilage typically indicates improper sealing if canned, or contamination if stored in the refrigerator. Ensure jars are perfectly clean, lids seal properly (if canning), and always use clean utensils when serving to avoid introducing bacteria. Discard any jam that shows signs of mold or unusual odors.
Can I cut down the amount of sugar in a jam recipe?
Reducing sugar can impact the jam’s set, flavor, color, and shelf stability. Sugar acts as a preservative and contributes to the gelling process. If you significantly reduce sugar, you may need to rely on added pectin, use specific low-sugar pectin, or plan to store the jam in the refrigerator or freezer.

Ingredients for Easy Homemade Cherry Jam:
- 2 ½ cups fresh cherries, pitted and chopped
- 1 cup granulated sugar
- 2 Tablespoons fresh lemon juice (from about 1 lemon)
Instructions: Making Your Delicious Homemade Cherry Jam

Prepare the Cherries: Start by washing and pitting your fresh cherries. For this recipe, you’ll want to chop them into smaller pieces – this helps them break down more easily and releases their natural juices. Measure out 2 ½ cups of your prepared cherries.

Combine Ingredients: In a medium-sized, heavy-bottomed pot or Dutch oven, combine the pitted and chopped fresh cherries, granulated sugar (1 cup), and fresh lemon juice (2 Tablespoons).

Initial Simmer: Place the pot over medium heat. Stir the mixture occasionally, allowing the sugar to dissolve. As it heats, the cherries will release their juices, and the syrup will begin to turn a beautiful, rich dark red color. This process usually takes about 5 to 7 minutes.
Achieve a Rolling Boil: Increase the heat to medium-high and bring the jam mixture to a full, rolling boil. This means the boil should be vigorous and continue even when you stir it.
Thicken the Jam: Continue to cook the jam at this rolling boil for 8 to 10 minutes, stirring occasionally to prevent sticking. You’ll notice the mixture beginning to thicken as it cooks.
Test for Doneness (The Cold Plate Test): This is the key to perfect jam! Before removing from heat, carefully drop a few spoonfuls of the hot jam onto a small plate that has been chilled in the freezer. Allow the jam to cool on the plate for 15-20 seconds. Then, gently tilt the plate vertically.
- If the jam starts to run quickly, it’s not ready; cook for another minute before retesting.
- If the jam mostly stays in place, has a slightly gelled appearance, and wrinkles when you push it gently with your finger, it’s done! Remove from heat.

Cool & Store: Carefully pour the hot cherry jam into clean, sterilized jars. Seal the jars tightly. Allow the jam to cool completely at room temperature. As it cools, the jam will continue to thicken and set. For best results and optimal consistency, allow the jam to set overnight in the refrigerator before using.

Refrigerate: Store your homemade cherry jam in the refrigerator. It will keep well for several weeks.
There’s immense satisfaction in making your own fruit jam from scratch. This easy cherry jam recipe delivers incredible flavor with minimal fuss, proving that homemade doesn’t have to be hard. Slather it on your favorite bread, swirl it into yogurt, or even use it as a glaze for savory dishes.
What’s your favorite way to enjoy homemade cherry jam? Share your ideas in the comments below!

Homemade Cherry Jam
Ingredients
- 2 ½ cups fresh cherries pitted and chopped
- 1 cup granulated sugar
- 2 Tablespoons fresh lemon juice from about 1 lemon
Instructions
- Prepare the Cherries: Start by washing and pitting your fresh cherries. For this recipe, you’ll want to chop them into smaller pieces – this helps them break down more easily and releases their natural juices. Measure out 2 ½ cups of your prepared cherries.
- Combine Ingredients: In a medium-sized, heavy-bottomed pot or Dutch oven, combine the pitted and chopped fresh cherries, granulated sugar (1 cup), and fresh lemon juice (2 Tablespoons).
- Initial Simmer: Place the pot over medium heat. Stir the mixture occasionally, allowing the sugar to dissolve. As it heats, the cherries will release their juices, and the syrup will begin to turn a beautiful, rich dark red color. This process usually takes about 5 to 7 minutes.
- Achieve a Rolling Boil: Increase the heat to medium-high and bring the jam mixture to a full, rolling boil. This means the boil should be vigorous and continue even when you stir it.
- Thicken the Jam: Continue to cook the jam at this rolling boil for 8 to 10 minutes, stirring occasionally to prevent sticking. You’ll notice the mixture beginning to thicken as it cooks.
- Test for Doneness (The Cold Plate Test): This is the key to perfect jam! Before removing from heat, carefully drop a few spoonfuls of the hot jam onto a small plate that has been chilled in the freezer. Allow the jam to cool on the plate for 15-20 seconds. Then, gently tilt the plate vertically.
- If the jam starts to run quickly, it’s not ready; cook for another minute before retesting.
- If the jam mostly stays in place, has a slightly gelled appearance, and wrinkles when you push it gently with your finger, it’s done! Remove from heat.
- Cool & Store: Carefully pour the hot cherry jam into clean, sterilized jars. Seal the jars tightly. Allow the jam to cool completely at room temperature. As it cools, the jam will continue to thicken and set. For best results and optimal consistency, allow the jam to set overnight in the refrigerator before using.
- Refrigerate: Store your homemade cherry jam in the refrigerator. It will keep well for several weeks.
Notes
Shelf-Stable (Canned): If properly processed using a water bath canner, jam can last for at least 1 year in a cool, dark place. Once opened, it should be refrigerated.
Nutrition
Nutrition information is automatically calculated, so should only be used as an approximation.